A lateral collateral ligament (LCL) injury is usually caused by your knee being pushed outwards (away from your other knee). This may happen if you have a blow to the inside of your leg, which can happen during contact sports such as football.
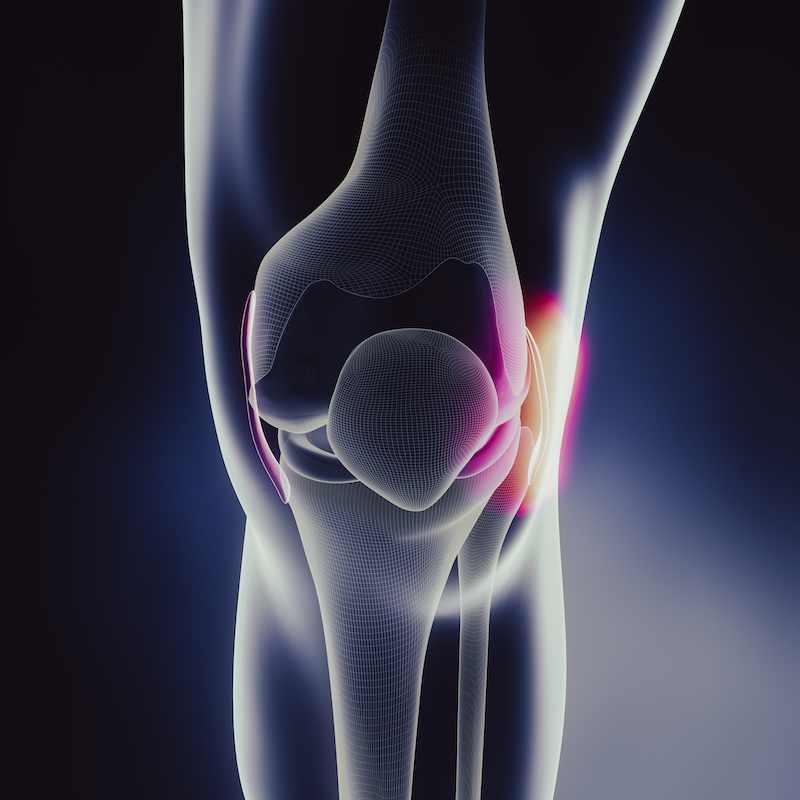
The Lateral Collateral Ligament (LCL) is found on the inside of the knee and is a tough fibrous tissue that attaches bone to bone.
This ligament, along with the Medial Collateral Ligament (MCL), helps to form the knee joint by attaching to the shin and the thighbone, it also provides stability and ensures that the knee functions properly when you move.
Ligament sprains most commonly happen when the ligament is very quickly put on an excessive stretch, has a large force applied to it or takes direct contact. That is why ligament injuries are often easy to identify as they are normally linked to a traumatic incident such as a slip, trip, fall or collision.
In some cases, low-level LCL sprains are caused by repeated stress being applied to the knee causing the ligament to stretch. This can often be seen in dancers and gymnasts.
There are different levels of a sprain.
Grade 1 is an overstretch of the ligament, leaving small tears to some of the fibres.
Grade 2 is a partial tear. Somewhere along the ligament, there will be a significant tear to the ligament but it will still be attached
Grade 3 is a complete tear through the centre of the ligament. There is also something called an avulsion where the ligament is intact but has been pulled from the bone.


We strongly recommend that you have any suspected injuries fully assessed by a medical professional.
It can be difficult to fully test this yourself because the medical test, the Varus/Valgus test, involves a medical professional supporting the leg and applying forces in different directions in an attempt to replicate your pain.
The best way to identify if you have a possible LCL sprain is by;
Pain = possible ligament sprain
Things to be aware of
There are a lot of different structures that attach to those points around the knee and it may not necessarily be a ligament sprain. As an example, the ITB inserts on the outside of the knee and can produce similar pain to the outside of the knee, especially when it is palpated.
However, pain is a good indication that something might be going on and it is definitely worth speaking to a medical professional to have it checked out.
You will feel the pain on the inside of the knee. Depending on the level of the injury there may be some swelling and mild bruising to the area.
An LCL sprain will feel like a constant pain with intermittent moments of sharp pain when the ligament is put under stress. It will hurt to put weight through the leg and the ligaments work to stabilise the joint. The knee will also feel stiff after periods of rest or in a fixed position.
You may not have the full range of movement in the knee due to pain or the build-up of scar tissue in the ligament.
If there has been a partial or complete tear to the ligament then it will feel unstable and the knee may wobble as you put weight through it. In some cases, you may also experience weakness or numbness in the foot depending on the severity of the injury.
The following protocol can immediately help a Grade 1&2 sprain or can be used after surgery on an LCL rupture.
The POLICE protocol
When acute pain first appears follow this protocol:
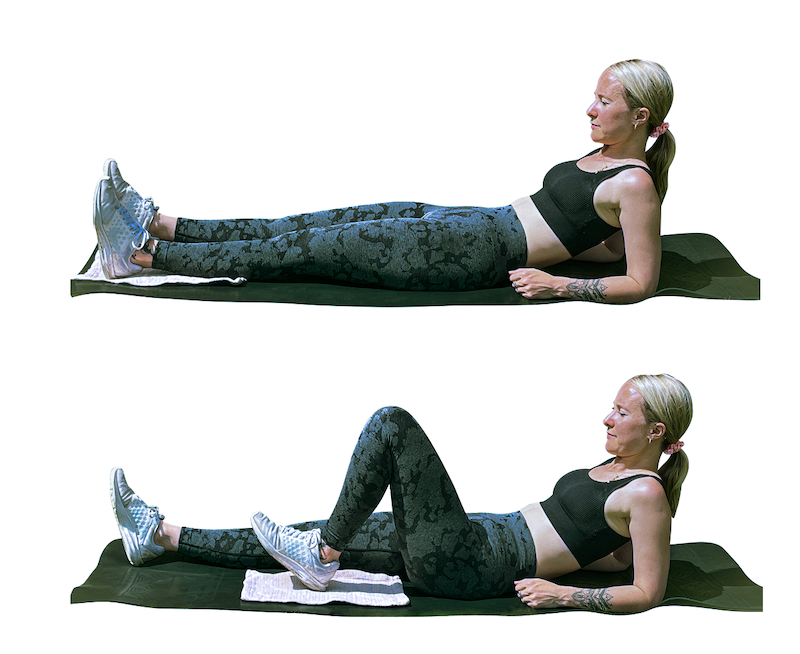
This exercise is designed to strengthen the hamstrings and improve the range of movement in the knee
Frequency and duration

This exercise targets the small quad muscle on the inside of the knee that controls the last 10 degrees of extension and helps stabilise the knee.
Frequency and duration
Alternatives

This exercise is designed to strengthen the hamstring muscles on the back of the thigh.
Frequency and duration
Alternatives
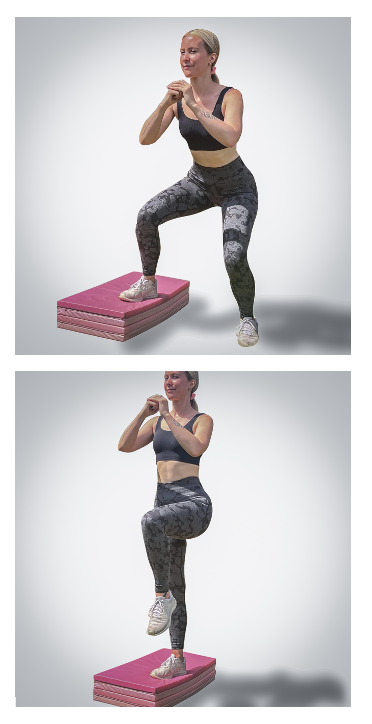
This exercise is designed to improve leg strength, balance and neuromuscular control.
Frequency and duration
Alternatives

This exercise is designed to build leg and core strength
Frequency and duration
Alternatives
The information on this site is intended for educational purposes.
You must not rely on the information on this website as an alternative to medical advice from your doctor or other professional healthcare provider. If you have any specific questions about any medical matter you should consult your doctor or other professional healthcare provider. If you think you may be suffering from any medical condition you should seek immediate medical attention. You should never delay seeking medical advice, disregard medical advice, or discontinue medical treatment because of information on this website.
No Thanks – I’ll pay full price
Close Window
Close Window